
hexo基础配置

hexo基础配置
小枫安装hexo
hexo安装命令
1 | npm install hexo-cli -g |
1 | hexo init blog |
1 | cd blog |
1 | npm install |
1 | npm install hexo-deployer-git --save |
1 | npm install hexo-renderer-pug hexo-renderer-stylus --save |
本地显示博客
执行以下命令
1 | hexo g |
1 | hexo s |
执行完即可登录 http://localhost:4000/ 查看效果
安装butterfly主题
安装butterfly主题
参考教程: https://butterfly.js.org/posts/21cfbf15/#%E5%AE%89%E8%A3%9D
1 | git clone -b master https://github.com/jerryc127/hexo-theme-butterfly.git themes/butterfly |
github访问不了的也可以用gitee源
1 | git clone -b master https://gitee.com/immyw/hexo-theme-butterfly.git themes/butterfly |
将博客部署到 Github Pages 上
到目前为止,我们的本地博客就成功搭建了,但是现在我们只能通过本地连接查看博客,我们要做的是让其他人也能够访问我们的博客,这就需要我们将博客部署到 Github Pages 上
部署前置步骤
一、注册 Github 账户:点击此处访问 Github! 官网,点击 Sign Up 注册账户
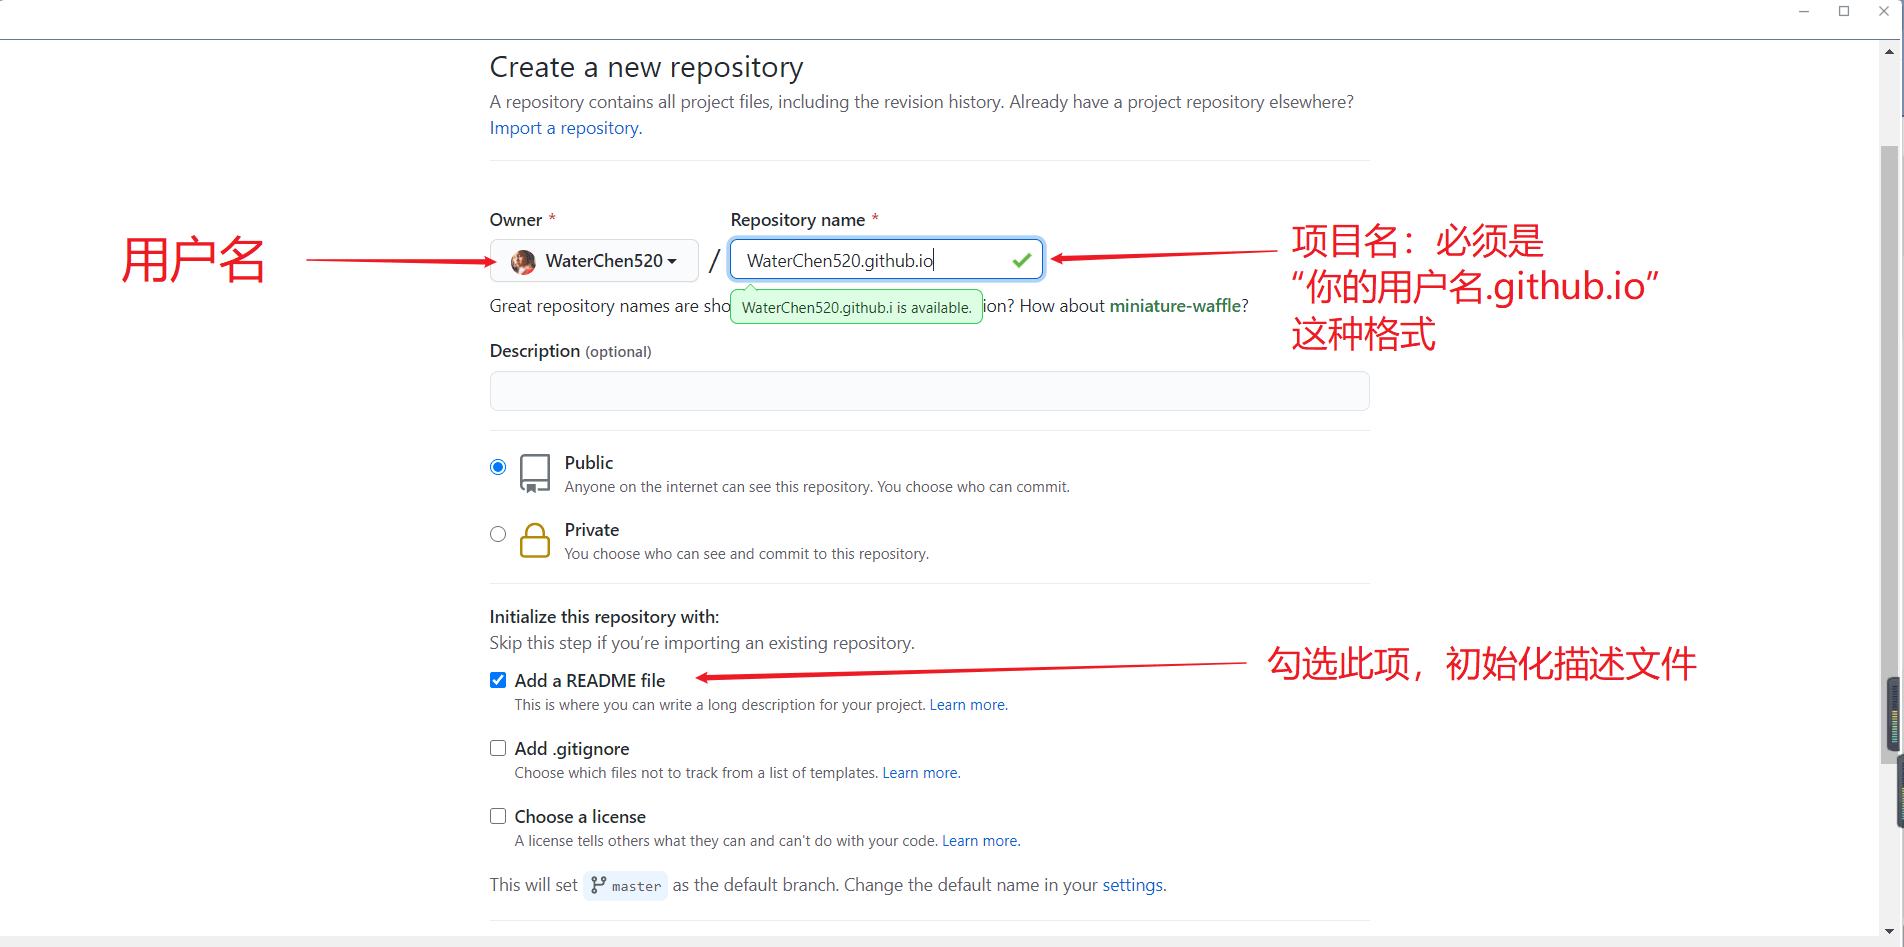
二、创建项目代码库:点击 New repository 开始创建,步骤及注意事项见图: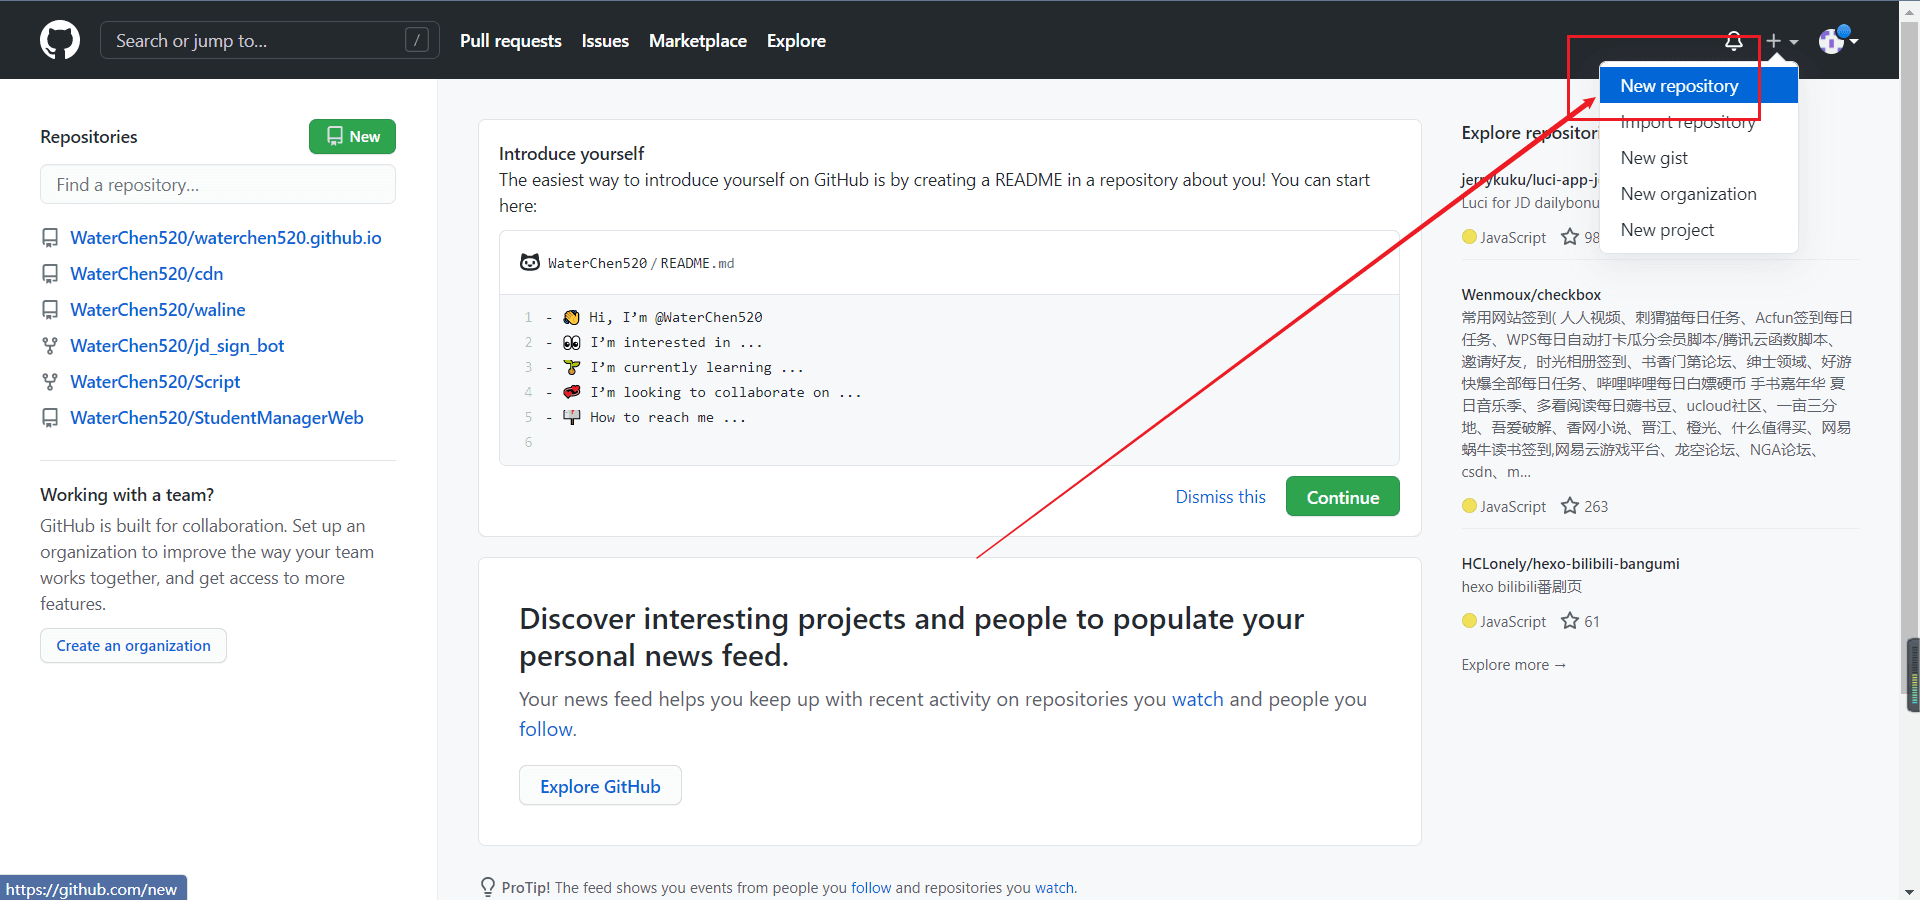
三、配置 Git 个人信息
Git 会根据用户的名字和邮箱来记录提交,GitHub 也是用这些信息来做权限的处理,输入以下命令进行个人信息的设置,把名称和邮箱替换成你自己的,名字可以不是 GitHub 的昵称,但为了方便记忆,建议与 GitHub 一致
1 | git config --global user.name "此处填你的用户名" |
1 | git config --global user.email "此处填你的邮箱" |
四、配置 SSH 密钥:只有配置好 SSH 密钥后,我们才可以通过 git 操作实现本地代码库与 Github 代码库同步,在你第一次新建的文件夹里面(如:我的文件夹为:F\reva_Blog) Git Bash Here 输入以下命令
1 | ssh-keygen -t rsa -C "your email@example.com" |
之后会出现:
1 | Generating public/private rsa key pair. |
然后会出现:
1 | Enter passphrase (empty for no passphrase): |
接下来屏幕会显示:
1 | Your identification has been saved in /c/Users/you/.ssh/id_rsa. |
而ssh密钥就在C:\Users\Administrator.ssh\id_rsa.pub这个路径下。
四、在 GitHub 账户中添加你的公钥
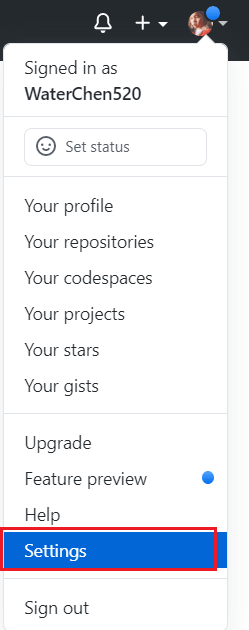
1.登陆 GitHub,进入 Settings:
2.点击 SSH and GPG Keys:
3.选择 New SSH key:
4.粘贴密钥:
五、测试
直接在桌面右键 点击 Git Bash Here,输入以下命令输入以下命令:
1 | ssh -T git@github.com |
之后会显示:
输入 yes 后会显示:
此时表示设置正确
将本地文件更新到GitHub仓库里
一、登录 Github 打开自己的项目 yourname.github.io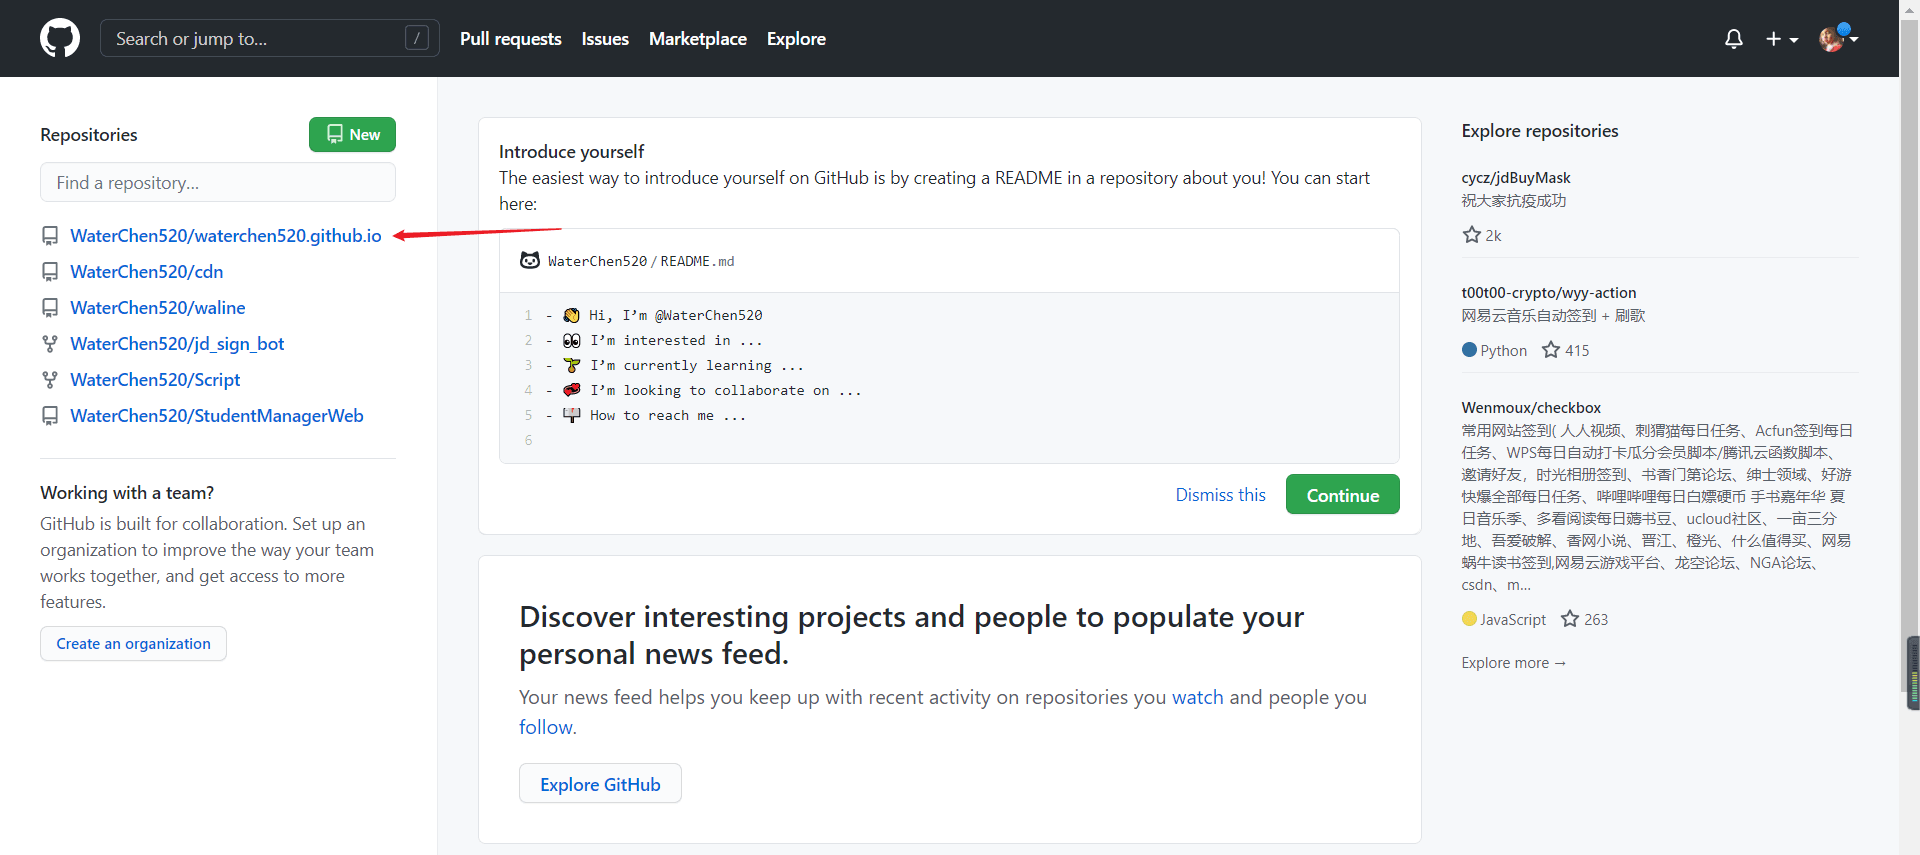
二、鼠标移到 Code 按钮,点击按钮复制,或者直接把 SSH 全部复制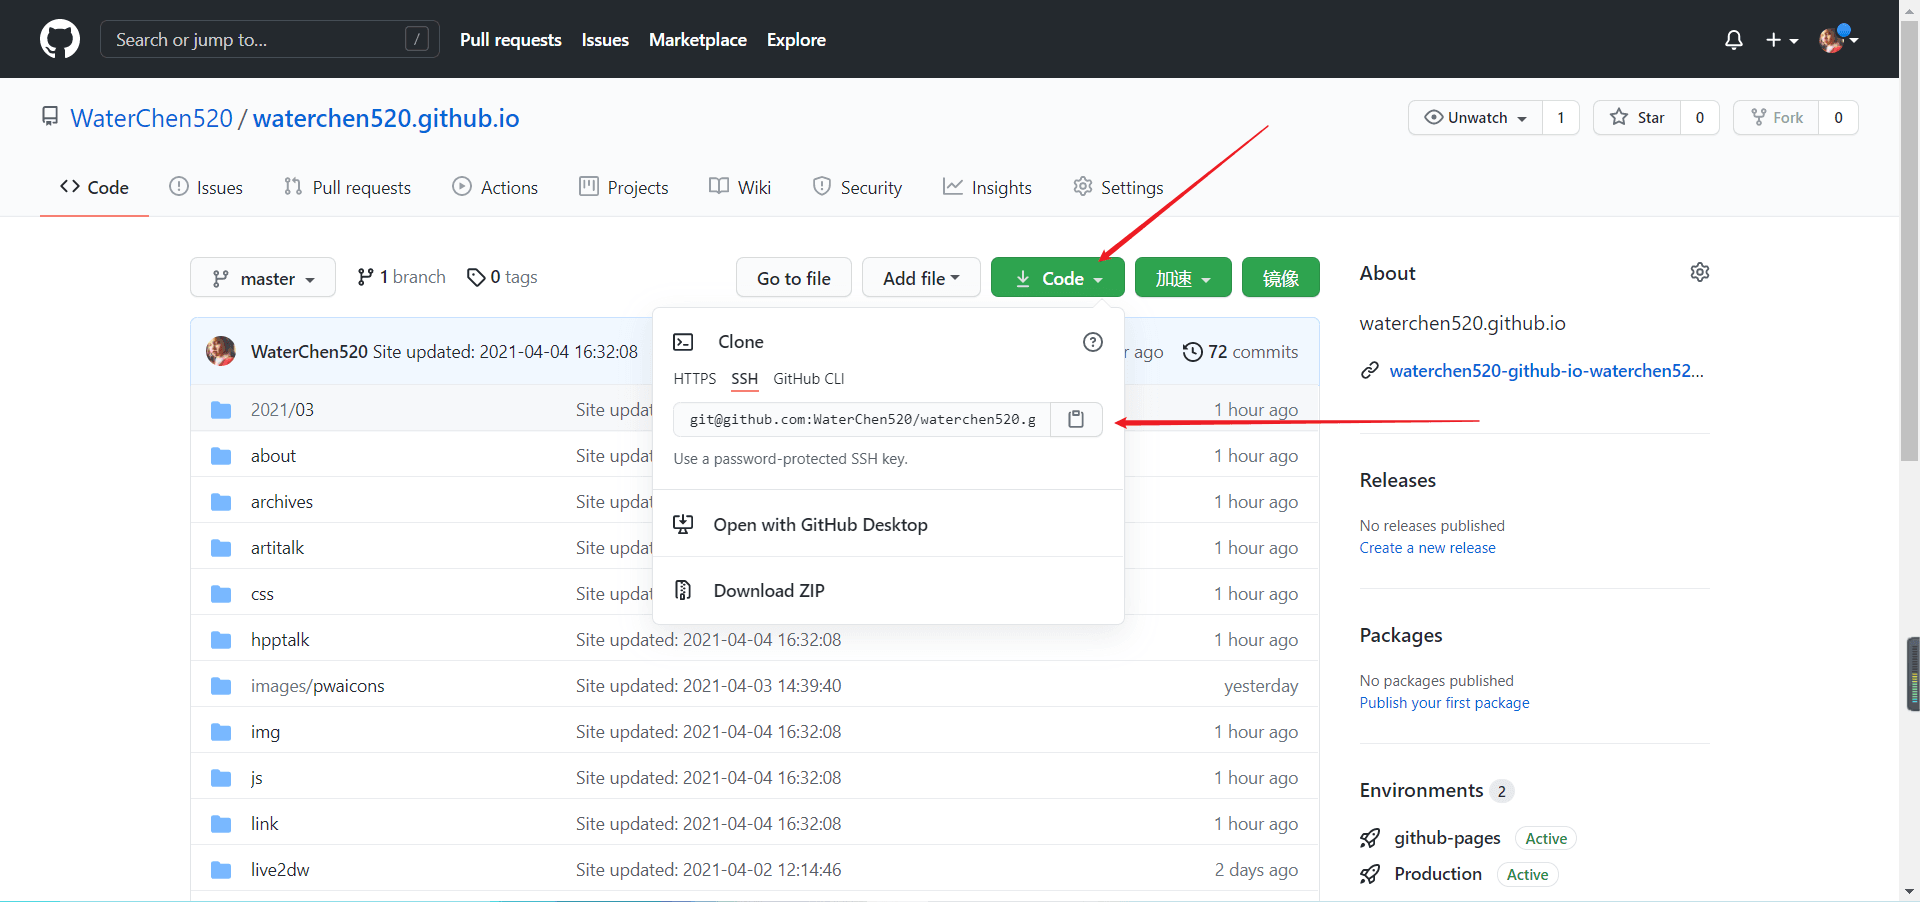
三、一键复制地址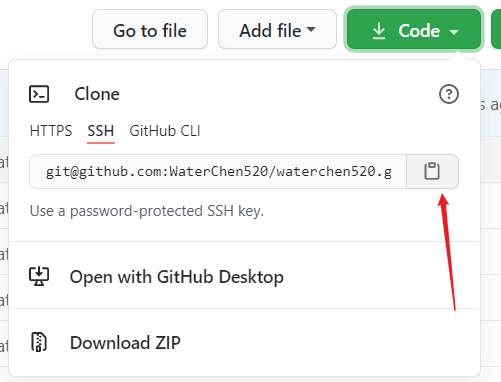
四、打开你创建的 Hexo 文件夹(如:F:\QiQi_Blog\Hexo),右键用记事本(或者 Notepad++、Vs Code 等)打开该文件夹下的 _config.yml 文件
五、滑到最下面,按下图修改 _config.yml 文件并保存
六、在 Hexo 文件夹下执行以下命令
1 | hexo g -d |
执行完之后会让你输入你的 Github 的账号和密码,如果此时报以下错误,说明你的 deployer 没有安装成功
1 | ERROR Deployer not found: git |
需要执行以下命令再安装一次:
1 | npm install hexo-deployer-git --save |
再执行
1 | hexo g -d |
你的博客就会部署到 Github 上了
七、访问博客
你的博客地址:https://你的用户名.github.io, 比如我的是:https://reva2080.github.io ,现在每个人都可以通过此链接访问你的博客了
教程就到这里啦,晚安


